How to Clean 6 Popular Coffee Makers for Better Coffee
Your coffee maker is the unsung hero of your morning routine, transforming beans and water into that perfect cup that gets you going. But if you’re just giving it a quick rinse under the tap, you’re not doing it justice. Coffee makers collect oils, grounds, and mineral buildup that can turn your brew stale or bitter over time. Regular cleaning keeps your machine running smoothly and ensures every sip tastes fresh, just like it did the first time you used it.
This guide walks you through cleaning six popular coffee makers—Chemex, Keurig, Moka Pot, AeroPress, French Press, and Drip Coffee Maker. Each method is simple, uses everyday household items, and takes just a few minutes to master. I’ve also included a chart to compare cleaning efforts, so you can find the best approach for your brewer. Whether you’re a daily coffee drinker or an occasional sipper, here’s how to keep your coffee maker spotless and your coffee tasting its best.
Why Cleaning Your Coffee Maker Matters
Every time you brew, coffee leaves behind oils and grounds that cling to your machine’s surfaces. Hard water adds limescale, especially in pod or drip brewers, which can clog parts and dull flavors. Left unchecked, residue can foster mold or bacteria, affecting both taste and safety. Regular cleaning removes buildup, protects your machine’s lifespan, and lets the true flavors of your beans shine through, whether you’re using a Costa Rican single-origin or a bold espresso blend.
General Cleaning Tips
Before getting into specific methods, here are some universal tips to clean any coffee maker effectively:
- Read the Manual: Your machine’s manual has tailored cleaning advice to prevent damage. Dig it out or find it online.
- Rinse First: Start by rinsing removable parts with warm water to clear loose grounds or residue.
- Set a Schedule: Clean weekly for daily use, monthly for occasional brewing, and deep-clean with vinegar or descaling solutions every 1–3 months.
- Be Thorough: Scrub all components, including filters, reservoirs, and crevices where gunk hides.
- Taste Test: If your coffee tastes flat or off, it’s a sign your machine needs attention.
- Know the Materials: Glass, stainless steel, aluminum, or plastic parts need different care. Avoid harsh cleaners on sensitive materials like aluminum.
Supplies You’ll Need
- White vinegar (distilled, for descaling)
- Mild, unscented dish soap
- Soft brush or sponge
- Toothbrush (for tight spots)
- Microfiber dish cloth
- Baking soda (optional, for gentle scrubbing)
- Warm water
How to Clean 6 Popular Coffee Makers
1. Chemex Coffee Maker
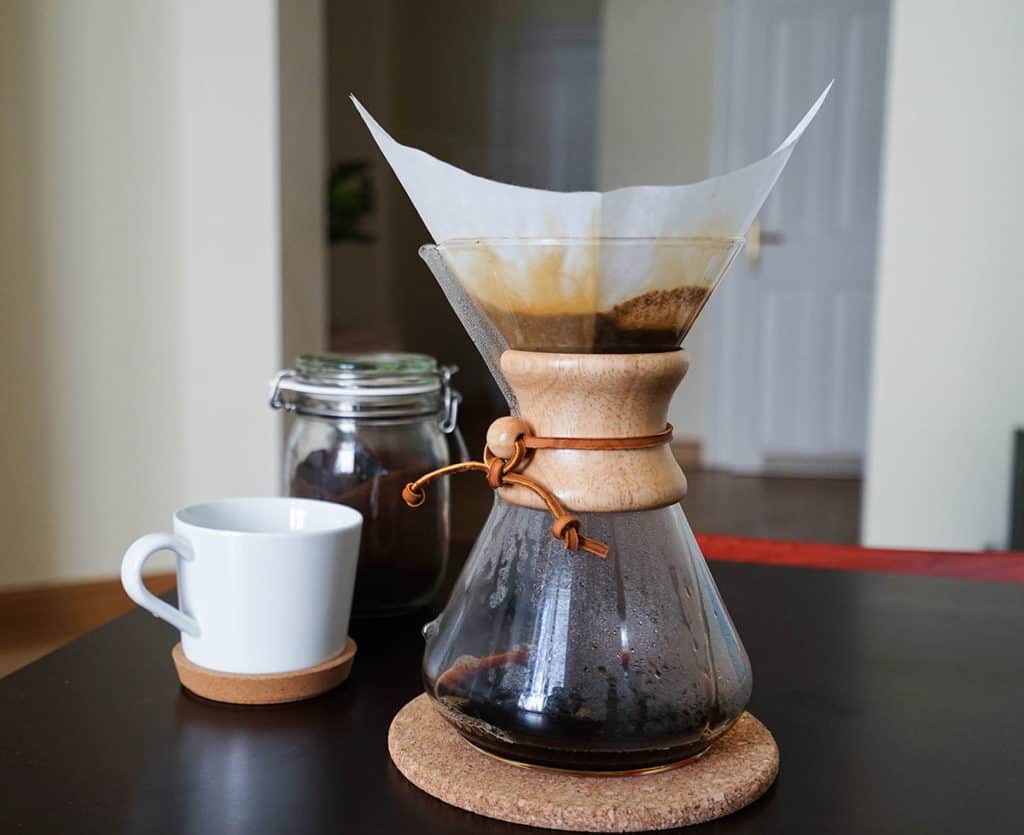
The Chemex is a pour-over icon, blending art and science to brew smooth, clean-tasting coffee. Its elegant hourglass design, crafted from borosilicate glass, has been a favorite since the 1940s, gracing both home kitchens and modern cafés. Loved by coffee purists for its ability to highlight delicate flavors, the Chemex is also a breeze to clean thanks to its minimalist build. However, coffee oils can cling to the glass, dulling its shine and subtly altering your brew’s taste if not addressed regularly.
Steps:
- Gather Supplies: Mix 2 tablespoons of table salt, 1 teaspoon of mild dish soap, and 1 cup of ice-cold water in a bowl. Salt acts as a gentle abrasive, and cold water keeps soap suds in check.
- Clean the Carafe: Pour the mixture into the Chemex and swirl for 2–3 minutes to lift oils and stains. Use a soft bottle brush for the narrow neck.
- Rinse Thoroughly: Rinse with warm water several times to remove all soap and salt, which can affect future brews if left behind.
- Dry: Wipe with a microfiber cloth and air-dry upside down to avoid water spots.
- Clean the Filter Holder: Wipe wooden or metal filter holders with a damp cloth and dry immediately to prevent damage.
Frequency: Clean after every use for daily brewers; weekly for occasional use. Deep-clean monthly with a 1:1 vinegar-to-water solution (soak 10 minutes, rinse well) for stubborn stains.
Tip: Avoid abrasive scrubbers to protect the glass. Check Chemex prices on Amazon if you’re eyeing one.
2. Keurig Coffee Machine
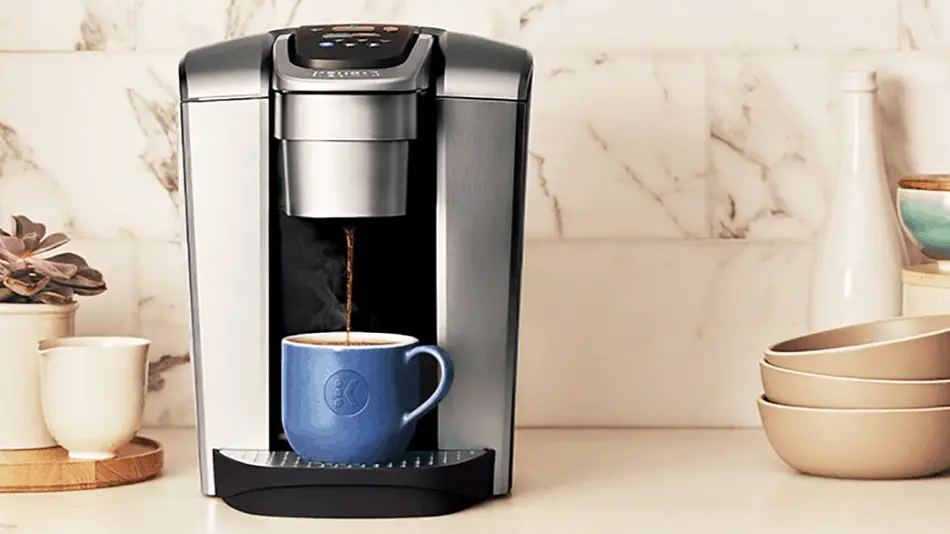
Keurig machines have revolutionized coffee with their quick, single-serve pods, making them a staple in offices and homes worldwide. Their convenience is unmatched—pop in a K-Cup, press a button, and you’ve got coffee in under a minute. But that speed comes with a catch: the machine’s water reservoir, needle, and pod holder can trap coffee grounds, oils, and limescale, especially if you use hard water. Regular cleaning keeps your Keurig brewing consistently and prevents off-tasting cups.
Steps:
- Disassemble: Unplug the machine. Remove the water reservoir, lid, drip tray, and K-Cup holder.
- Wash Removable Parts: Clean the reservoir, drip tray, and K-Cup holder with warm water and mild dish soap. Use a toothbrush to scrub the K-Cup holder’s needle carefully to clear grounds.
- Wipe Exterior: Clean the machine’s outer surfaces with a damp microfiber cloth, focusing on the pod area.
- Descale: Fill the reservoir to the max line with a 1:1 mix of white vinegar and water. Place a large mug under the spout. Run the largest brew cycle (without a pod) until the reservoir empties. Repeat with clean water 2–3 times to rinse vinegar.
- Reassemble and Test: Refill with filtered water, reassemble, and run a water-only cycle to ensure no vinegar taste remains.
Frequency: Clean removable parts weekly; descale every 3–6 months, or when the “descale” light appears. Heavy users (5+ cups daily) should descale monthly.
Tip: Filtered water reduces scale buildup. Browse Keurig models on Amazon for current prices.
3. Moka Pot
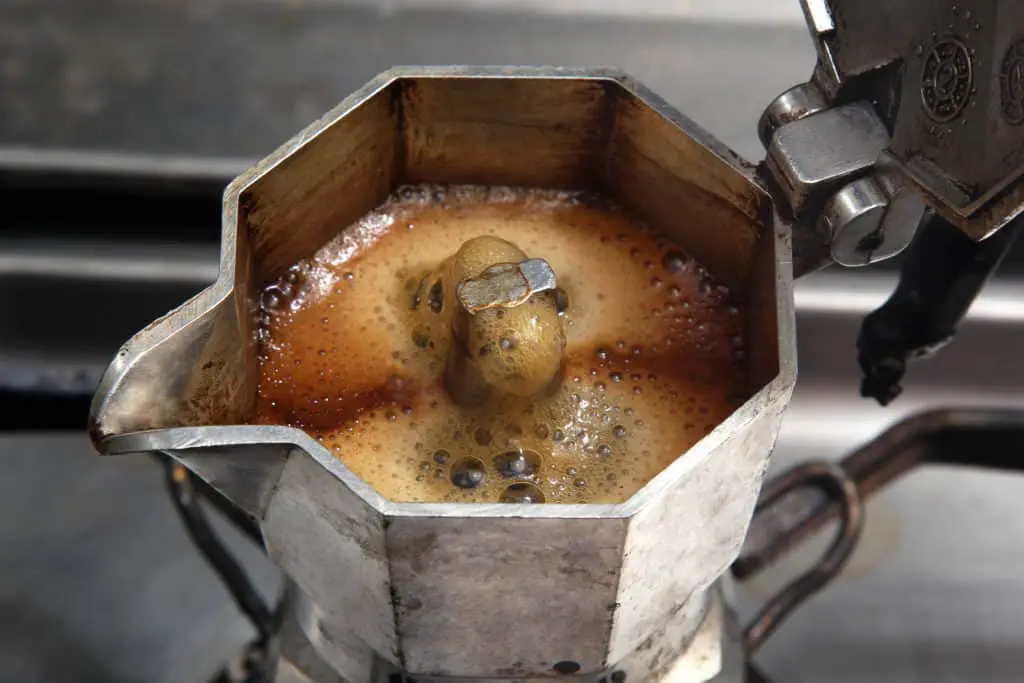
The Moka Pot, often called a stovetop espresso maker, is a beloved tool for crafting bold, espresso-like coffee at home. Invented in Italy by Bialetti in the 1930s, it uses steam pressure to push water through grounds, delivering a rich, intense brew that’s perfect for a morning jolt or an after-dinner treat. Its aluminum or stainless steel construction is durable but sensitive to harsh cleaning methods, so care is needed to maintain its performance and avoid metallic flavors in your coffee.
Steps:
- Disassemble: Once cooled, separate the top chamber, filter basket, and bottom water chamber.
- Clean Parts: Mix 1 tablespoon white vinegar, 2 teaspoons lemon juice, and 1 cup warm water. Scrub each part with a soft brush, especially the top chamber where residue collects.
- Run a Cleaning Cycle: Fill the bottom chamber to the safety valve with the vinegar-lemon mix. Assemble without coffee grounds and heat on medium until the solution flows through. Discard the liquid.
- Rinse Cycle: Repeat twice with plain water to remove cleaning solution.
- Dry: Wipe with a microfiber cloth and air-dry to prevent water spots.
Frequency: Clean after every use; deep-clean with vinegar-lemon mix monthly.
Tip: Skip dish soap to avoid residue affecting coffee flavor. Check Bialetti Moka Pots on Amazon for reliable options.
4. AeroPress
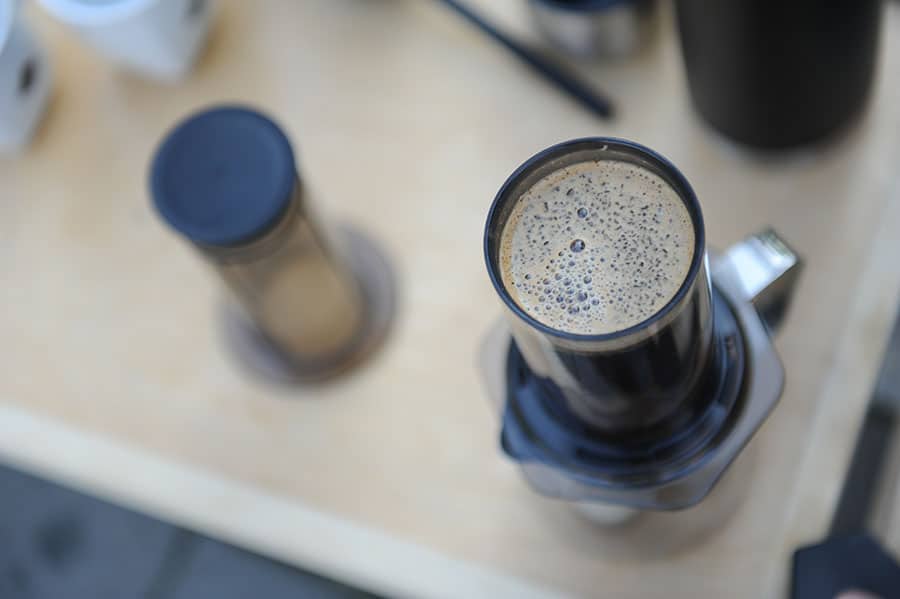
The AeroPress is a modern marvel, celebrated for its portability and versatility in brewing everything from espresso-style shots to smooth filter coffee. Invented in 2005, it’s a favorite among travelers, campers, and coffee geeks, even inspiring global brewing competitions. Its lightweight plastic design and quick brew time make it a joy to use, and cleaning is just as simple, though you’ll need to pay attention to the rubber seal to keep it in top condition.
Steps:
- Disassemble: Separate the plunger, chamber, cap, and filter. Discard used paper filters and coffee grounds.
- Rinse: Wash all parts under hot water. Use a toothbrush to scrub the rubber seal on the plunger, where grounds tend to stick.
- Deep-Clean (Optional): Monthly, soak parts in a 1:1 vinegar-water solution for 10 minutes, then rinse thoroughly.
- Dry: Wipe with a microfiber cloth and air-dry, ensuring the rubber seal is dry to prevent mold.
Frequency: Clean after every use (1–2 minutes). Deep-clean monthly.
Tip: Metal filters need thorough rinsing if used instead of paper. Explore AeroPress recipes or check prices on Amazon.
5. French Press

The French Press, also known as a press pot, is a timeless brewer that delivers rich, full-bodied coffee with a hands-on brewing experience. Its glass or stainless steel carafe and mesh filter capture the coffee’s natural oils, creating a robust flavor that’s hard to beat. However, those oils and grounds can cling to the mesh and glass, requiring a bit more effort to clean than some other brewers to keep your coffee tasting fresh and your press looking pristine.
Steps:
- Disassemble: Remove the plunger and separate the mesh filter from the lid.
- Clean the Filter: Scrub the mesh with a soft brush or sponge under hot water to remove grounds and oils. Use a toothbrush for tight spots.
- Clean the Carafe: Wash the glass beaker with warm water and 1 teaspoon of mild dish soap or baking soda. Scrub the bottom with a bottle brush. Rinse thoroughly to avoid soap taste.
- Deep-Clean: Monthly, soak the carafe in a 1:1 vinegar-water solution for 10 minutes to remove stains, then rinse well.
- Dry: Air-dry all parts upside down. Ensure the mesh filter is dry to prevent rust.
Frequency: Clean after every use; deep-clean monthly.
Tip: Glass French Presses outperform plastic for flavor and durability. Check Bodum models on Amazon.
6. Drip Coffee Maker
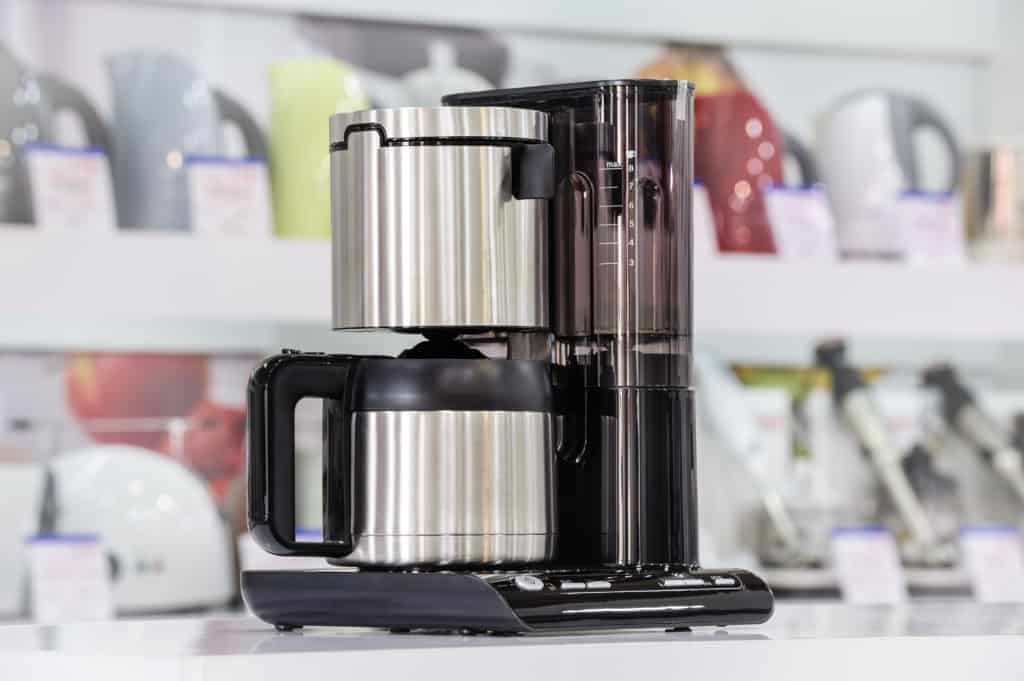
Drip coffee makers are the backbone of countless households, brewing pots of coffee with minimal fuss. From basic models to programmable machines, they’re reliable workhorses that have fueled mornings for decades. But their reservoirs, filter baskets, and carafes can accumulate oils and limescale, especially with frequent use, which can dull your coffee’s flavor and slow the machine’s performance.
Steps:
- Disassemble: Remove the carafe, filter basket, and any removable reservoir parts.
- Wash Parts: Clean the carafe and filter basket with warm water and mild dish soap. Use a soft brush for basket crevices.
- Descale: Mix equal parts white vinegar and water (e.g., 2 cups each). Pour into the reservoir, place the carafe under the spout, and run a brew cycle. Pause halfway for 10 minutes to loosen scale.
- Rinse: Run 2–3 cycles with clean water to remove vinegar. Rinse the carafe thoroughly.
- Wipe Exterior: Clean the machine’s body with a damp microfiber cloth.
Frequency: Clean carafe and basket weekly; descale monthly or when coffee tastes off.
Tip: Filtered water minimizes scale. Check Amazon for drip coffee maker prices.
Choosing the Right Cleaning Method
Cleaning effort varies by coffee maker. The AeroPress is a quick rinse, while Keurig and Moka Pot require more steps due to their intricate parts. Here’s a chart to compare:
Note: Scores are illustrative based on general user experience. Frequency score: 10 = after every use, 1 = rarely.
Final Thoughts
Cleaning your coffee maker is a small effort that pays off in every cup. Whether you’re brewing with a sleek Chemex, a speedy Keurig, or a trusty Moka Pot, a regular cleaning routine keeps your machine fresh and your coffee flavorful. With basic supplies like vinegar, soap, and a brush, you can maintain your brewer’s performance and enjoy great coffee for years. Set a cleaning schedule, follow these steps, and brew on. Your perfect cup is ready.