
Sick of watery coffee from your drip machine? A stovetop percolator might be your new best friend. This old-school brewer, a kitchen staple for generations, pumps out rich, full-bodied coffee that fills your home with an unbeatable aroma. Whether you’re a coffee nerd or just dipping your toes into manual brewing, percolators offer a bold, hands-on way to up your coffee game.
In this guide, we’ll walk you through using a stovetop percolator, share tips for nailing the perfect cup, and explain why this method’s making a comeback. Grab your percolator, some fresh beans, and let’s brew.
Why Choose a Stovetop Percolator?
Percolators, patented in 1889, ruled kitchens until automatic drip machines stole the spotlight in the 1970s. Now, specialty coffee fans are bringing them back, pairing high-quality beans with this classic method for craft-level results. Unlike moka pots, which use fine grounds for an espresso-like brew, or electric percolators, which lack control, stovetop models let you dial in heat and timing for a bold, aromatic cup.
The magic lies in the process: water heats in the pot, rises through a tube, and showers over coarse grounds in a perforated basket, cycling repeatedly to extract deep flavors. The result? A robust coffee with more oils than drip brews, though it can turn bitter if you overdo it. Plus, that nostalgic gurgle and coffee scent are hard to beat, as X users rave about in 2025 posts praising brands like Farberware.
What You’ll Need
Brewing with a stovetop percolator is straightforward, but gather these first:
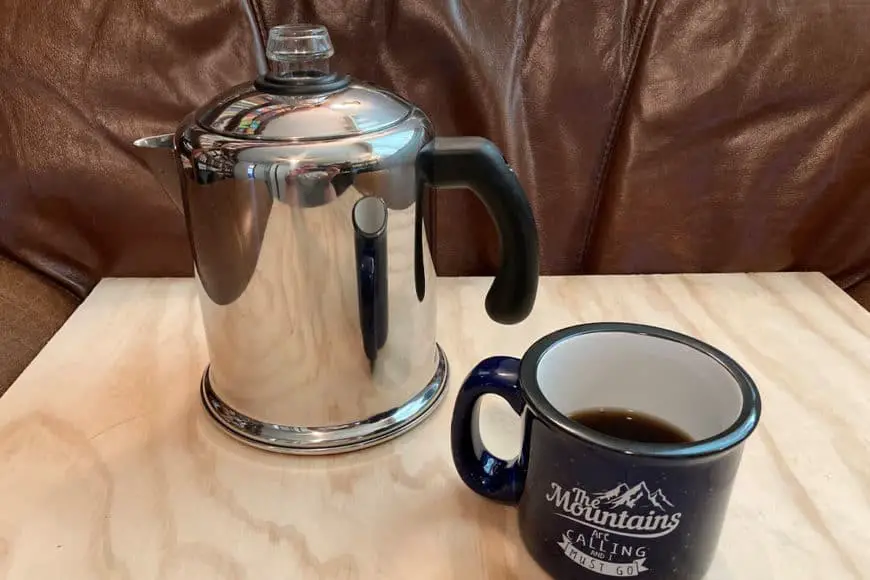
- Stovetop percolator (stainless steel or enamel, with tube and basket)
- Pot holder
- Fresh roasted coffee beans
- Conical burr grinder
- Filtered or spring water
- Tablespoon
- Timer
- Favorite mug
Avoid blade grinders—they create uneven grinds. A burr grinder ensures a uniform medium-coarse grind, like coarse sea salt, to prevent bitterness or sediment.
How to Brew with a Stovetop Percolator
Here’s a step-by-step guide to brewing, with tips to avoid common pitfalls. The table below summarizes the process for quick reference.
| Step | Action | Tip |
|---|---|---|
| 1. Measure Water | Fill pot with water (1 cup per serving, e.g., 8 oz). Heat without tube/basket. | Keep below 205°F; reduce heat if boiling starts. |
| 2. Grind Coffee | Grind beans medium-coarse (1 tbsp per cup). Add to basket, assemble tube, and place in pot. | Use fresh beans; avoid pre-ground to prevent staleness. |
| 3. Adjust Heat | Set to medium heat. Aim for 1 burble every 3 seconds in the lid’s knob (195–205°F). | Monitor closely; too hot risks bitterness. |
| 4. Time the Brew | Perk for 5–10 minutes (8 minutes baseline). Turn off heat, let sit 2 minutes. | Adjust time next brew for stronger/weaker coffee. |
| 5. Remove Basket | Use pot holder to remove lid, tube, and basket. Place on towel to catch drips. | Move carefully to avoid spilling grounds. |
| 6. Pour and Enjoy | Pour into mug, sip, and note grind, time, or heat for next brew. | Record adjustments to perfect your recipe. |
Detailed Steps
- Measure Water: Pour 8 oz of filtered or spring water per cup into the pot, without the tube or basket. Heat on medium until warm (below 205°F). If it boils (212°F), lower the heat to avoid over-extraction.
- Grind Coffee: Grind fresh beans to a medium-coarse texture (1 tbsp per cup). Place grounds in the basket, attach it to the tube, and set the assembly in the pot. Secure the lid.
- Adjust Heat: Turn to medium heat. Watch the glass knob on the lid—coffee should burble up once every 3 seconds, signaling 195–205°F, per SCA standards. Too frequent? Lower heat. Too slow? Raise slightly.
- Time the Brew: Perk for 5–10 minutes (try 8 minutes first). Longer brews are stronger but risk bitterness. After, turn off heat and let the pot sit for 2 minutes to settle grounds.
- Remove Basket: Using a pot holder, carefully remove the lid, tube, and basket. Set them on a towel to catch drips, keeping grounds out of your pour.
- Pour and Enjoy: Pour into your mug and sip. Jot down notes: too strong? Use less coffee or perk for less time. Too weak? Add more grounds or extend the brew. Experiment one variable at a time.
Tips for Better Percolator Coffee
Great coffee hinges on four factors: water, beans, time, and temperature. Here’s how to nail them:
- Water Quality: Use filtered or spring water (50–150 ppm minerals). Tap water with chlorine or distilled water (too flat) can ruin the flavor. A faucet filter works if you don’t have bottled water.
- Fresh Beans: Buy beans roasted within 2 weeks and grind just before brewing. Pre-ground coffee oxidizes, losing flavor. Brands like Blue Bottle or local roasters are solid picks.
- Grind Size: Medium-coarse prevents over-extraction and sediment. If coffee’s bitter, coarsen the grind; if weak, use more grounds or a finer (but not espresso-fine) grind.
- Timing and Heat: Stick to 5–10 minutes at 195–205°F. Over-perking (12+ minutes) or high heat (210°F+) makes coffee bitter. A thermometer helps, but the burble trick works.
- Paper Filter: Place a paper filter in the basket to trap fine grounds, reducing sediment in your cup, especially with older percolators.
Choosing a Quality Percolator
New percolators (Farberware, Coletti) cost $20–$50 online at Amazon or Walmart. For vintage vibes, check flea markets, ensuring the tube, basket, and lid are intact. Stainless steel is durable and easy to clean; enamel adds retro charm but may chip. The pot’s base heats water, the tube pulls it up, and the basket holds grounds, with a glass knob showing brew progress.
Cleaning Your Percolator
Cleaning is a breeze. All parts (pot, tube, basket) are dishwasher-safe, but hand-washing works too. Use dish soap and a long-handled nylon brush for the tube. For stains, add ½ cup water and 2 tbsp baking soda to the pot, scrub with a soft cloth, and brush the tube. For deep cleaning, fill with equal parts water and white vinegar, run a cycle (no coffee or basket), then rinse thoroughly. Dry well to prevent rust.
Troubleshooting Common Issues
- Bitter Coffee: Shorten brew time (try 6 minutes), use coarser grounds, or lower heat to 195°F.
- Weak Coffee: Add more grounds (1.5 tbsp per cup) or perk longer (up to 10 minutes).
- Grounds in Cup: Use a paper filter or ensure the basket’s holes aren’t worn. Check grind isn’t too fine.
- Uneven Brew: Stir grounds in the basket for even distribution before brewing.
Why Percolators Shine
Stovetop percolators aren’t the fastest—expect 10–15 minutes total—but they deliver a bold, aromatic cup that drip machines can’t match. Their affordability, durability, and camping-friendly design (no electricity needed) make them versatile. The hands-on process lets you tweak every variable, turning brewing into a ritual. As specialty coffee grows, percolators offer a budget-friendly way to join the craft coffee wave without fancy gear.
Ready to perk up your mornings? Grab a stovetop percolator, experiment with your brew, and savor the bold flavors. Got questions or tips? Drop them in the comments!