
If you’re a longtime coffee drinker, you probably started your coffee journey with a percolator, or maybe even a Keurig. However, if you’re a burgeoning coffee connoisseur, you’ve probably considered graduating to a manual brewing process, which allows you a lot more control over the variables that can affect the nuances of your coffee’s flavor.
What is the difference between immersion and Drip (Pour Over) Coffee Brewing? With immersion brewing you use a coarse grind and blend the water and coffee at the same time. With a Drip (Pour Over) Coffee maker, you use a medium, medium coarse, or medium fine grind and gradually over time add water over the coffee grounds.
Unlike coffee machines, which automatically set the brew time and temperature based off of their manufacturers’ settings, manual brewing processes let you experiment with your coffee, refining each aspect until you find the secret formula for your perfect cup of coffee!
Two of the most popular manual brewing methods are immersion coffee brewing and pour over brewing. Both methods can provide great results, but each method has its definite pros and cons. If you’re looking to invest in some new manual brewing paraphernalia, and aren’t sure where to begin, keep reading!
What is Immersion Coffee Brewing?
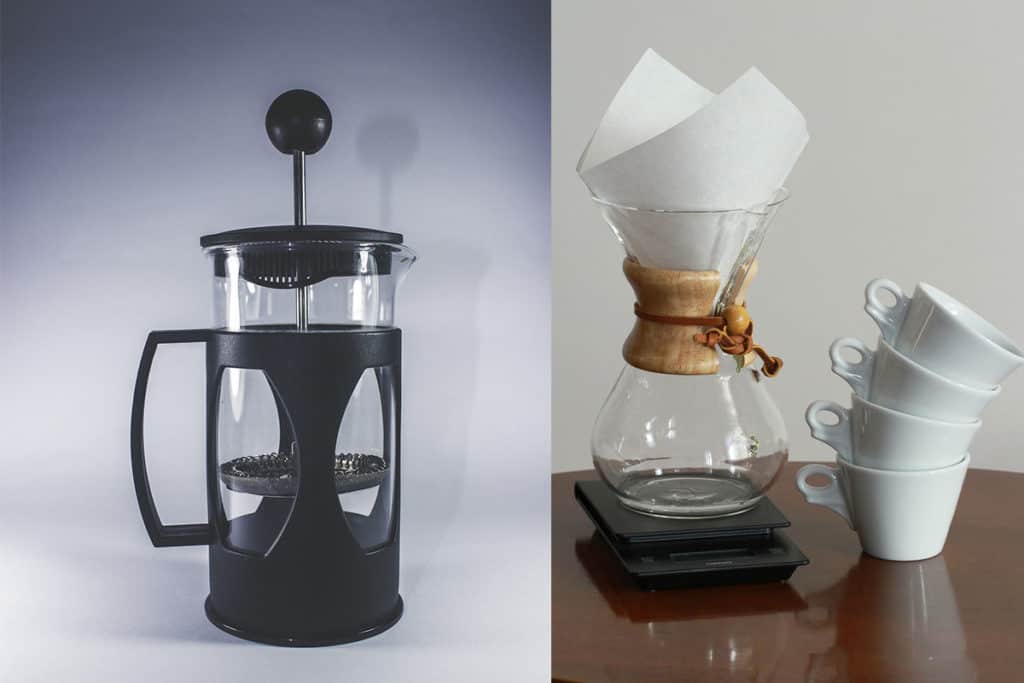
Immersion coffee brewing is any manual brewing method that immerses coffee grounds with water. For Example. a French Press, Clever Dripper or an Aeropress.
You control the temperature of the water, the size of the coffee grounds, and the amount of time that the coffee grounds and water interact. Once you’re ready, you pour the mixture through a filter, and you’re left with a delicious cup of immersion-brewed coffee!
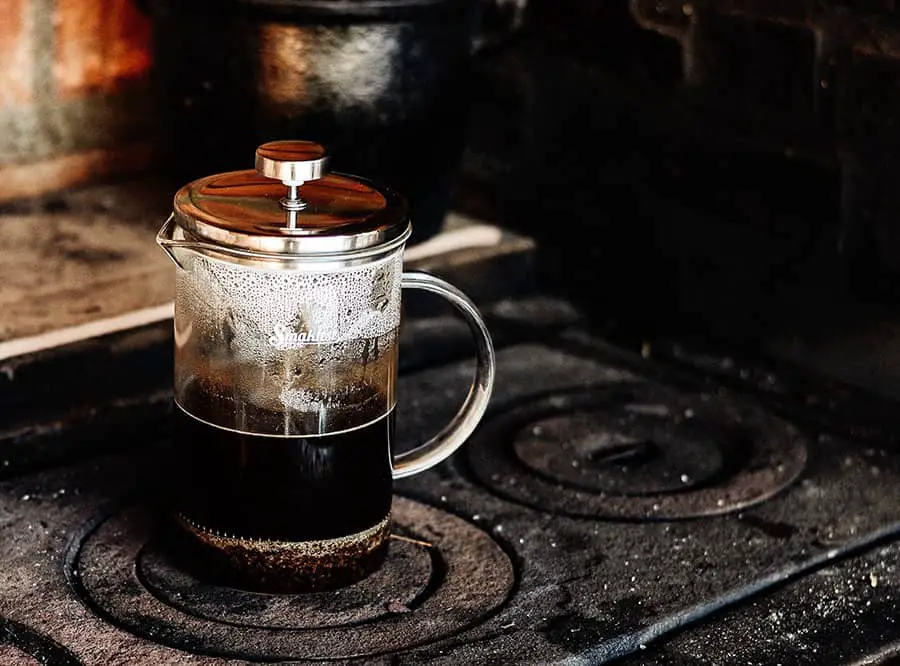
There are a lot of different coffee gadgets that fall under the immersion brewing umbrella. The most famous is probably the French press, which is basically just a cylindrical container with a plunging mesh filter.
Immersion Brewing with a French Press
To use a French press, all you do is heat your water and prepare your coffee grounds. Place the coffee grounds in the cylinder, evenly pour your brewing water in, and press the plunger until all of the coffee grounds are submerged.
Wait about four minutes, press the plunger the rest of the way down, pour your coffee into a mug or thermos, and enjoy! It’s important to note that this method works best when used with coarse or medium-coarse coffee grounds.
If your coffee grounds are too thin, the resulting coffee might taste overly harsh or bitter. In addition to the French press method, other devices for immersion brewing include the Clever immersion brewer, which uses a paper filter, the Aeropress, and the Café Solo.
Immersion Brewing Essentials
In order to get the best results with the immersion brewing method, you’re going to need a couple of tools. It’s important to purchase a quality coffee grinder. If you’re serious about the immersion brewing method, controlling the size and uniformity of your coffee grounds is a must.
It might not seem like that big of a deal, but un-uniform or incorrectly-sized coffee grounds can have a negative impact on your finished cup of coffee, making it taste too strong, too weak, or even gritty or sandy. The appropriate size of coffee grounds depends on the specific immersion brewing method you use.
Generally speaking, finer coffee ground size works best with immersion brewing methods that involve a relatively short period of contact between water and coffee grounds.
Coarser coffee ground size works better with immersion brewing methods that involve a longer brew time. If you find that your coffee keeps tasting weak or thin, try adjusting your ground size to be finer. If you find that your coffee is consistently too harsh or gritty, try making your coffee grounds coarser.
You’re also going to need a kettle with temperature settings, or a good thermometer. The temperature of the water you use makes a big difference in your coffee.
The ideal water temperature for immersion coffee brewing is between 195ºF and 205ºF (90.5ºC and 96ºC), but some specific immersion brewing methods call for water that has just reached the boiling point (212ºF or 100ºC), or for water that is a little cooler (176ºF or 80ºC). In order to get the best results, you should have some method for accurately heating water to fairly specific temperatures.
Finally, if you really want to get fancy, you can purchase a gram scale. These scales work well for measuring out ratios of coffee grounds to water. Many professional coffee brewers recommend that you use 60 grams of coffee for every liter of water.
However, you can vary your ratio anywhere between 1:15 and 1:17 while still falling within industry standards. Messing with this ratio too drastically might negatively affect your final result, but feel free to experiment until you find the perfect ratio for your personal tastes!
What is Drip (Pour Over) Brewing?
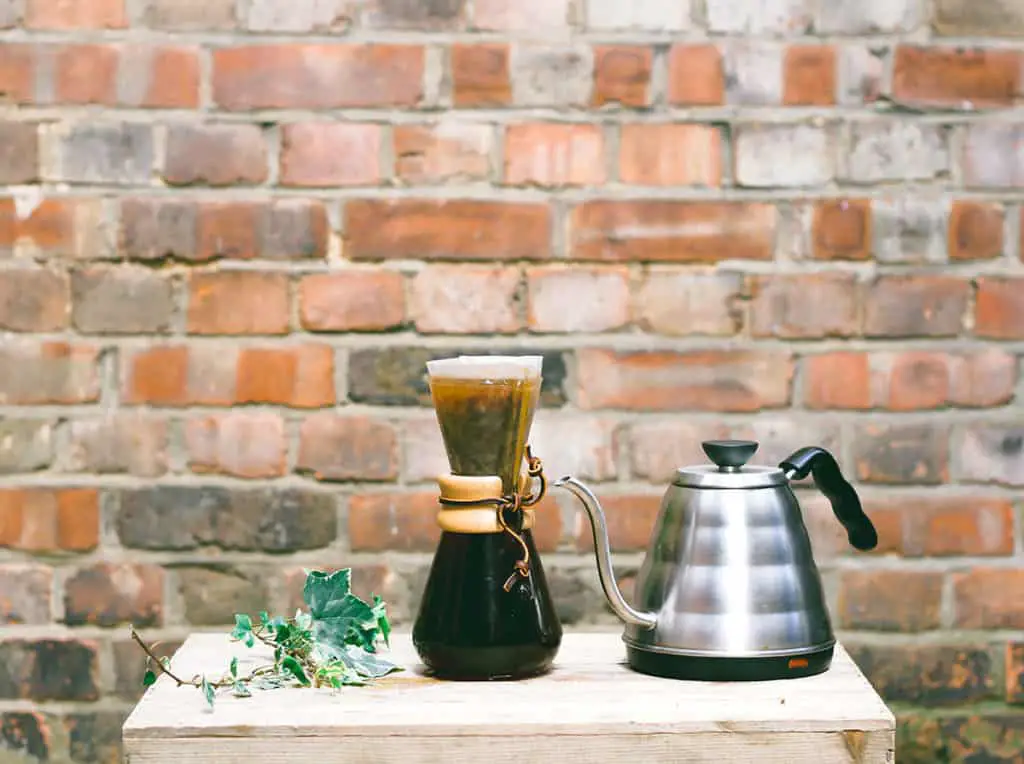
Pour over brewing is the other most popular method of manual coffee brewing. Unlike immersion brewing, which involves letting your coffee grounds sit in water for a certain period of time before filtering them out, pour over brewing involves just pouring water through grounds and a filter, as its name suggests.
Examples of Pour Over brewers are the Chemex, Hario V60 and Kalita Wave.
One of the major pros of pour over brewing is its relative speed—the process of immersion brewing can take a while to finish, since the coffee grounds need time to sit in the water. The process of pour over brewing continually introduces new, fresh water to the coffee grounds, which speeds up the brewing process.
However, when done improperly, the continual introduction of new, fresh water can also extract too much flavor from the coffee grounds too quickly, decreasing the quality of the finished product.
Drip (Pour Over) Brewing Essential
The tools you need in order to make quality pour over coffee are actually similar to those of immersion brewing: a burr grinder, a kettle and thermometer, and if you’re feeling fancy, a gram scale. The size of your coffee grounds should be rather coarse.
The temperature of your water should be around 210ºF (99ºC) for lighter roasts, and around 200ºF (93ºC) for darker roasts. Finally, the ratio of coffee to water should be between 60 and 70 grams of coffee for every liter of water (1:14 to 1:16).
As always, these guidelines are a great place to start if you’re a beginner to pour over coffee, but feel free to experiment! Changing one variable at a time is the best way to narrow down the recipe for your perfect cup of coffee.
Drip (Pour Over) Brewing Guide
The first step of making pour over coffee is wetting the grounds. Once you’ve put your coffee grounds in the filter, you pour just enough water to wet them without letting the water run through into the basin below, and let the wetted grounds sit for about 30 seconds.
This allows the coffee grounds to release all of the carbon dioxide trapped inside. If you don’t do this step, your water won’t be able to fully penetrate the coffee grounds, and your resulting coffee might taste weak or watery.
After you’ve wetted your coffee grounds and let them sit for 30 seconds, you can continue to pour hot water through the filter. The pace at which you should pour your water depends on the roast level of your coffee beans.
If you’re using a darker roast, you should aim for your total brew time to be between 90 seconds and three minutes. If you’re using a light or medium roast, you should try for a total brew time of three to four minutes. Note that these total brew times include “drip time.” Even after you stop pouring water, it will continue to drip through the filter for 20 to 60 seconds.
Many different companies make pour over brewing gadgets, but their general structures are pretty much the same across the board. All pour over equipment consists of a mesh filter or a brewing cone in which you place a paper coffee filter.
Drip (Pour Over ) Coffee Brewers
In some designs, you just place the filter or brewing cone over your coffee mug. In other designs, you place the filter or filter holder over a decanter, and once you’re done making your coffee, you pour it out into your coffee mug. The most iconic pour over brewing equipment is the Chemex, which consists of a decanter and a brewing cone, and comes in three different sizes.
The V60 is another classic pour over dripper, which gets placed right over your coffee mug. It comes in glass, ceramic, plastic, copper, and steel version, three different sizes, and many different colors, so you can customize it to your own personal style!
If sustainability is a concern for you, and you want to avoid using paper filters, consider buying a KONE stainless steel filter. It’s designed to be used with a Chemex decanter, replacing the paper filters and reducing wastefulness.
Final Thoughts
Manual brewing methods like immersion brewing and pour over brewing are an excellent way to exercise your inner coffee nerd, allowing you to experiment with different ground sizes, water temperatures, and water-to-coffee ratios in order to find the formula for your perfect cup of coffee!
There’s a ton of fancy manual brewing gadgetry on the market, but hopefully, this comprehensive guide to the basics of immersion and pour over brewing helps you figure out which method would work best for your lifestyle, and which equipment you really need. Have fun, experiment, and enjoy your custom cup of coffee!