Coffee cupping is a sensory adventure that lets you explore the diverse flavors, aromas, and textures of coffee, whether you’re a casual drinker or a dedicated enthusiast. This professional tasting method, once reserved for roasters and baristas, is now accessible to anyone with a few tools and fresh beans.
In this guide, we’ll walk you through how to set up a coffee cupping session at home, why it’s worth doing, and tips to sharpen your palate. Get ready to elevate your coffee game and impress your friends with your newfound tasting skills.
Why Cup Coffee at Home?
Coffee cupping is a way to deepen your appreciation for coffee’s complexity. For amateurs, it’s a chance to discern differences between beans before adding milk or sugar. For enthusiasts, it’s a tool to identify favorites, compare origins, or explore roasting impacts.
Cupping fosters connection, whether sharing insights with friends or sparking curiosity about coffee’s nuances. Cafes use cupping to train staff and engage customers but doing it at home lets you control the experience, experiment freely, and develop a refined palate over time. Plus, it’s a fun, low-stakes way to feel like a coffee pro.
What Is Coffee Cupping?
Cupping is a standardized tasting method where coffee professionals and enthusiasts evaluate beans’ quality by observing, smelling, and slurping in a controlled environment. It compares attributes like aroma, flavor, acidity, body, and aftertaste across samples.
Home cupping, popular among coffee lovers, is a relaxed version of professional sessions, allowing exploration of beans from various regions, roasts, or farms. With practice, this skill unveils coffee’s diversity, from Ethiopian’s fruity notes to Colombian’s nutty depth.
Cupping Essentials: Tools You’ll Need
Consistency is key in cupping to ensure fair comparisons. Here’s a list of essentials:
- Fresh Roasted Coffee: 3-4 samples (8-12g each) for beginners; more for advanced cuppers. Choose diverse origins (e.g., Ethiopia, Colombia, Brazil) or roasts.
- Burr Grinder: Ensures uniform medium-coarse grind (like coarse sand). Flush between samples to prevent cross-contamination.
- Digital Scale: Measures precise coffee (8.5-9g) and water (150ml) for consistency.
- Timer: Tracks steeping (4 minutes) and cooling (8-10 minutes) to assess coffee at optimal stages.
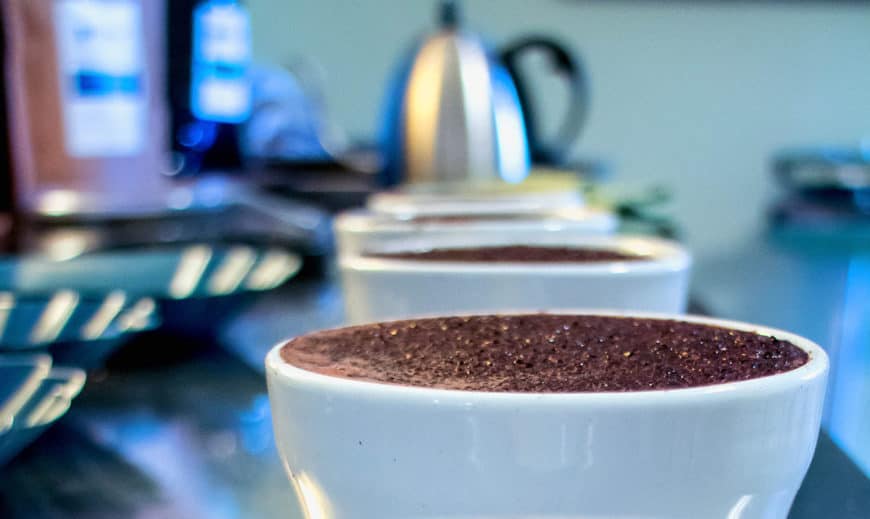
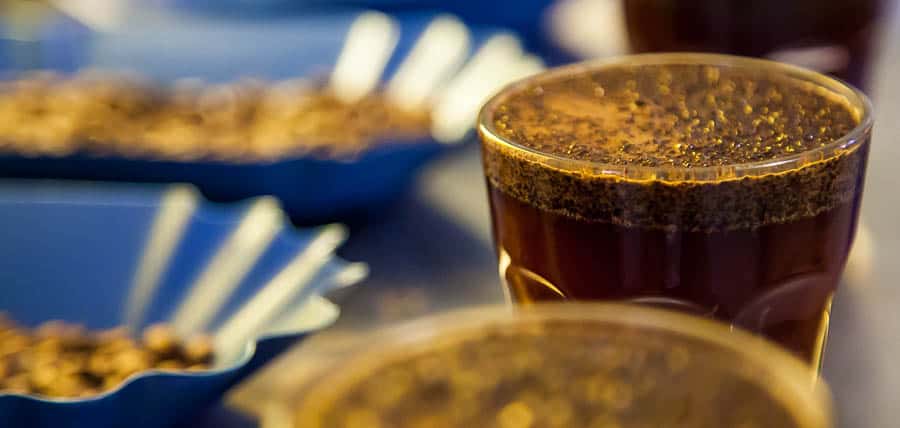
- Cupping Bowls or Mugs: 4-6 identical 7-8 oz ceramic or glass vessels to maintain consistent heat.
- Cupping Spoons: Rounded, silver-plated spoons (4-6) designed for slurping. Silver minimizes flavor alteration.
- Electric Kettle: 1.5-2 liters capacity to heat water to 195-205°F (91-96°C).
- Rinse Cups: 2 glasses with hot water for cleaning spoons between samples.
- Notebook or Cupping Forms: For recording aroma, flavor, and texture. SCA forms guide scoring, but notes suffice.
- Optional: Sample trays for organizing beans; spittoon for spitting (to limit caffeine).
An open mind is crucial—objectivity lets each coffee shine. A quiet, distraction-free space enhances focus on sensory details.
Step-by-Step Coffee Cupping Tutorial
Follow these steps to host a coffee cupping session at home:
Step 1: Select Fresh Roasted Coffee
Choose 3-4 coffee samples to keep the session manageable. Beginners can pick beans from different regions; advanced cuppers might compare roasts or varietals from one farm. Aim for beans roasted within 7-14 days for peak freshness. Variety fuels discovery, whether exploring reputations or finding backups.
Step 2: Flush the Grinder
Run a small amount (5-10g) of the new coffee through the burr grinder and discard it to clear residual grounds before grinding each sample, ensuring pure flavor profiles.
Step 3: Grind and Measure
Set the grinder to medium-coarse (like coarse sand). Weigh 8.5-9g of each coffee sample, grinding directly into separate cupping bowls. Label each bowl discreetly for blind tasting or openly if you prefer knowing origins.
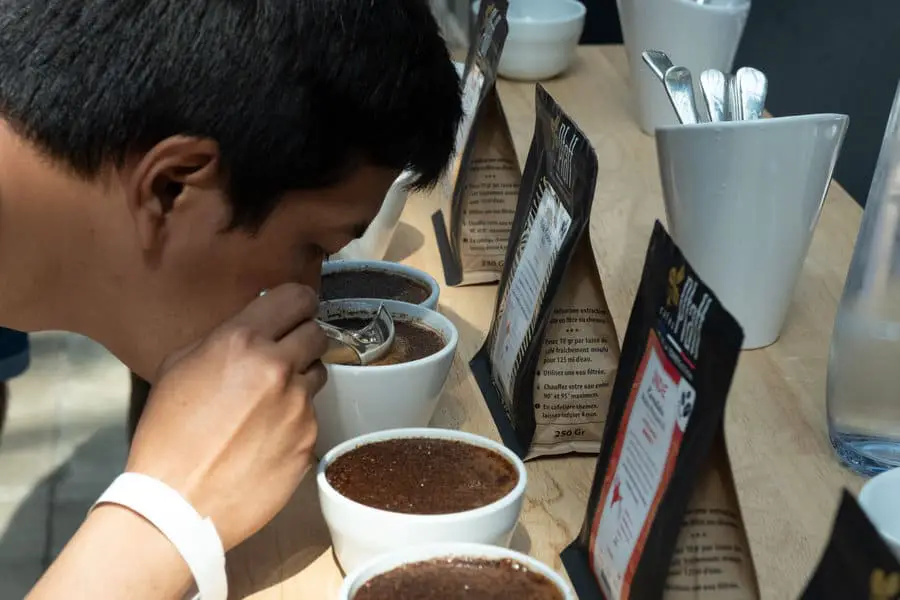
Step 4: Smell the Dry Grounds
Inhale deeply near each bowl, noting aromas like fruit, nuts, or floral hints. Open your mouth slightly while sniffing to enhance perception. Record impressions—there’s no right or wrong. Space bowls apart to avoid aroma overlap.
Step 5: Add Hot Water and Start Timer
Pour 150ml (5 oz) of water heated to 195-205°F into each bowl, covering grounds evenly. Start the timer immediately. Place cupping spoons in a rinse cup with hot water to keep them clean and warm. The coffee will form a crust as it steeps.
Step 6: Break the Crust
After 4 minutes, stir the crust gently 2-3 times with a spoon to release aromatic gases. Inhale the wet aroma close to the brew, noting richer notes. Rinse spoons between samples or use a new one per cup.
Step 7: Remove Floating Grounds
Skim the surface with a spoon to remove grounds and foam, reducing grit. Stirring in a circular motion sinks grounds to the bowl’s bottom. Let the coffee cool for 8-10 minutes (to 140-150°F) for optimal flavor detection.
Step 8: Taste and Slurp
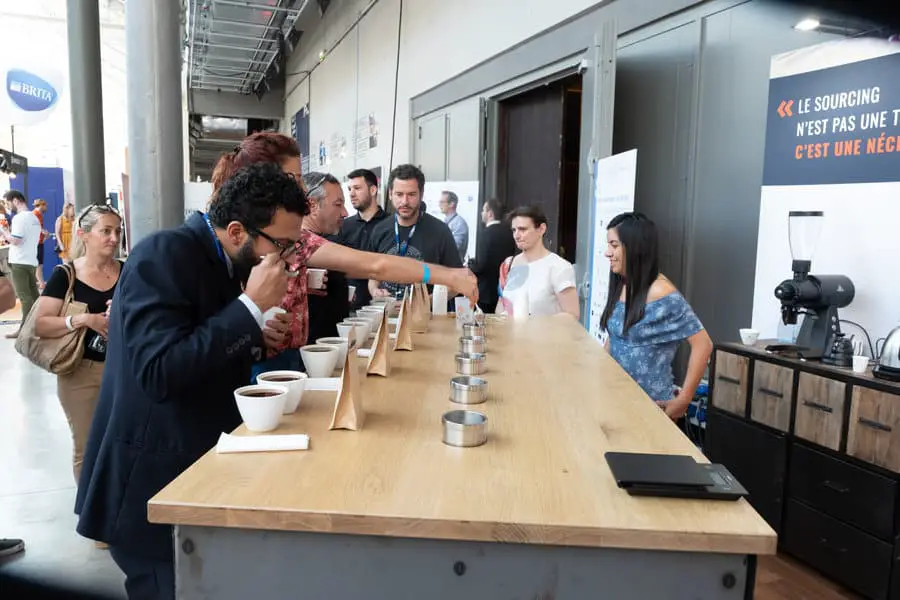
Scoop a small amount and slurp loudly to aerate the coffee across your palate, noting sweetness, acidity, body, and aftertaste. Rinse spoons between samples. Spit into a cup if tasting multiple coffees to limit caffeine. Taste each sample at least twice.
Step 9: Record Findings
Note aroma (dry and wet), flavor (e.g., berry, chocolate), acidity, body, and aftertaste for each coffee. Use SCA cupping forms or a notebook. Compare samples to identify favorites or patterns.
Step 10: Repeat Tasting
Taste all samples again to confirm impressions or catch missed details. Coffee evolves as it cools, revealing new flavors.
Why Cupping Matters
Cupping sharpens your ability to detect coffee’s nuances, from processing methods (washed vs. natural) to origin-specific traits. It helps pinpoint preferences, understand roasting impacts, and appreciate quality. Regular practice hones your palate, making you less likely to settle for subpar brews. Cupping also builds confidence in choosing beans and fosters a deeper connection to coffee’s craft.
Tips for a Great Cupping Experience
- Start Small: 3-4 samples prevent palate fatigue.
- Control Variables: Use identical bowls, water temperature, and grind size.
- Invite Friends: Share insights for a social, fun experience.
- Experiment: Try single-origin vs. blends or light vs. dark roasts.
- Reference Flavors: Use World Coffee Research’s flavor lexicon to identify notes.
Equipment and Setup Summary
Here’s a quick reference for your cupping setup:
| Item | Details | Why It Matters |
|---|---|---|
| Coffee Samples | 3-4, fresh roasted (8.5-9g each) | Ensures variety and freshness |
| Burr Grinder | Medium-coarse grind, flush between | Prevents cross-contamination |
| Digital Scale | Measures 8.5-9g coffee, 150ml water | Ensures consistency |
| Timer | Tracks 4-min steep, 8-10 min cool | Times critical tasting stages |
| Cupping Bowls | 4-6, 7-8 oz, identical | Maintains consistent heat |
| Cupping Spoons | 4-6, silver-plated, rounded | Enhances slurping, minimizes flavor change |
| Kettle | 1.5-2L, 195-205°F water | Precise temperature for extraction |
| Rinse Cups | 2, hot water | Keeps spoons clean |
| Notebook/Forms | Record aroma, flavor, body | Tracks findings for comparison |
Final Thoughts
Coffee cupping at home is an accessible, engaging way to explore coffee’s vast flavor landscape. With basic tools and an open mind, you can taste the difference between origins, roasts, and processing methods, building a sharper palate and deeper appreciation.
Whether hosting a cupping party or tasting solo, the process is as educational as it is enjoyable. Dive in, slurp loudly, and let each coffee tell its story—you’ll never look at your morning brew the same way again.